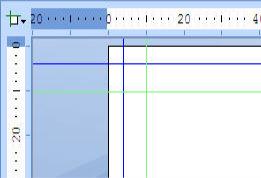
Guide Lines
Guide lines are non printing grid lines to help you to arrange and position objects. Moving or resizing objects to within a certain distance of a guide line causes the selection to snap to the line.
To add a guide line
|
|
Windows Mac From the View menu, select Layout Ruler. Select either a horizontal or vertical guide line. |

Note: When you drag a guide line, its default behavior is to snap to any existing objects. You can change this behavior by selecting or clearing the Guides Snap to Objects option in the View menu .
To set the "snap to" distance
Set the distance required for objects to snap to guide lines in Program settings, under Magnetic strength. The indicated number of points is the distance from the guide, within which an object will be drawn to the guide position.
To modify a Guide line position
- Select the Guide line.
- Right click on it.
- From the menu select “Position”.
The window will show the current coordinates of the Guide line. - Enter the new coordinates for the line position.
To remove a guide line
It is possible to remove a guide line by dragging it to an invalid location outside the layout. The drag cursor is updated to reflect whether releasing the mouse button will move or remove the folding line. Alternatively right click on the guide line and from the menu select " Remove" .