Content elements
Once you have created template, it can be filled with all kinds of elements, from text to barcodes and from tables to fields on a web form. All types of elements are listed on this page; see below.
There are several ways to insert elements, see Inserting an element.
Each element can have an ID and a class, as well as a number of other properties, depending on the element's type. When an element is selected, its properties can be changed; see Selecting an element, Attributes and Styling and formatting an element.
When you add elements, such as text, images or a table, to the content of a template, you are actually constructing an HTML file. It is possible to edit the source of the HTML file directly in the Designer; see Editing HTML.
Element types
The following types of content can be added to the content of a template:
- Images and Dynamic Images
- Text and special characters
- Date
- Table
- Boxes: Positioned Box, Inline Box, Div and Span
- Hyperlink and mailto link
- Barcode
- Web Forms and Web Form Elements
- Whitespace elements: using optional space at the end of the last page (Print context only)
- Page numbers (Print context only)
- Article, Section, Header, Footer, Nav and Aside are HTML5 semantic elements; see http://www.w3schools.com/html/html5_semantic_elements.asp
- Other HTML elements: Heading, Address and Pre
- Snippets: a Snippet is a small, ready-to-use piece of content in a file
- Business graphics
Wrapping elements in a box (see Boxes) or in a semantic HTML element makes it easier to target them in a script or a style sheet. Place the cursor in the element or select multiple elements. Then, on the menu, click Insert > Wrap in Box. You can now use the wrapper element as a script's or style's selector; see Using the Text Script Wizard and Styling and formatting.
Most elements are suitable for use in all contexts. There are a few exceptions, however. Forms and Form elements can be used on web pages only, whereas Whitespace elements and Page numbers can only be used in a Print context. Positioned boxes are well suited for Print sections, but are to be avoided in the Email
Whether it is best to use a Table or Box to position text, images and other elements, depends on the context in which they are used; see How to position elements for more information.
Editing HTML
When you add elements, such as text, images or a table, to the content of a template, you are actually constructing an HTML file.
To see this, toggle to the Design tab in the workspace. Click anywhere in the content. Take a look at the breadcrumbs at the top of the workspace. The breadcrumbs show the HTML tag of the clicked element, as well as the HTML tags of other elements to which the clicked element belongs. The clicked element is at the end of the line.
To edit the HTML text directly:
- In the workspace, toggle to the Source tab.
On this tab you can view and edit the content of the template in the form of plain text with HTML tags (note the angle brackets: <>). You may add and edit the text and the HTML tags, classes, ID’s and other attributes.
To learn more about HTML, see for example https://developer.mozilla.org/en-US/docs/Web/Guide/HTML/Introduction and http://www.w3schools.com/html/default.asp.
Many video courses and hands-on courses about HTML (and CSS) are offered on the Internet as well, some for free. Go, for example, to www.codeschool.com or www.codeacademy.com and look for HTML (and CSS) courses.
Attributes
ID and class
Every element in the content of a template can have an ID and a class. ID's and classes are particularly useful with regard to variable data (see Personalizing Content) and styling (see Styling templates with CSS files).
You can specify an ID and/or class when you add the element to the content.
To add an ID and/or class to an element that has already been added to a template, select the element (see Selecting an element) and type an ID and/or a class in the respective fields on the Attributes pane at the top right.
Other attributes
Apart from the ID and class, elements can have a varying number of properties, or 'attributes' as they're called in HTML (see Editing HTML). Which properties an element has, depends on the element itself. An image, for example, has at least four attributes: src (the image's URL), alt (alternate text), width and height. These attributes are visible on the Attributes pane when you click an image in the content.
For each type of element, a small selection of attributes is visible on the Attributes pane at the top right.
Changing attributes via script
Many attributes can be changed via the user interface. Another way to change attributes is by using a script.
Any of the Script Wizards can produce a script that changes an attribute of an HTML element. Set the Options in the Script Wizard to Attribute, to output the script's results to the value of a specific attribute. See Using the Text Script Wizard.
In code, you can change an element's attribute using the function attr(); see Writing your own scripts and Designer Scripts API.
Inserting an element
To insert an element in the content of a template:
- Click the respective toolbar button. Alternatively, click the element on the Insert menu.
- Add an ID and/or a class. ID's and classes are particularly useful with regard to variable data (see Personalizing Content) and styling (see Styling templates with CSS files).
- Use the Location drop-down (if available) to select where to insert the element.
- At cursor position inserts it where the cursor is located in the template.
- Before element inserts it before the HTML element in which the cursor is currently located. For example if the cursor is within a paragraph, the insertion point will be before the <p> tag.*
- After start tag inserts it within the current HTML element, at the beginning, just after the start tag.*
- Before end tag inserts it within the current HTML element, at the end, just before the end tag.*
- After element inserts it after the element in which the cursor is currently located. For example if the cursor is within a paragraph, the insertion point will be after the end tag of the paragraph (</p>).*
* If the current element is located inside another element, use the Elements drop-down to select which element is used for the insertion location. The list displays every element in the breadcrumbs, from the current selection point until the root of the body.
Selecting an element
When an element is selected, the Attributes pane shows the attributes of that element, and the Styles pane, next to the Attributes pane, shows which styles are applied to it.
To select an element in the content, you can of course click on it, but this isn't always as easy as it seems, especially when the element has elements inside it.
Click the Edges button on the toolbar to highlight borders of elements on the Design tab. The borders will not be visible on the Preview tab.
There are two more ways to select an element in the content:
- Using the Breadcrumbs at the top of the workspace.
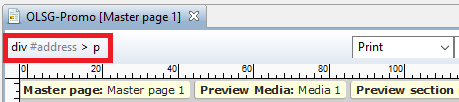
Breadcrumbs show the HTML tag of the clicked element, as well as the HTML tags of 'parent elements': elements inside of which the clicked element is located. The clicked element is at the end of the line.
Elements with classes or IDs show these details next to them, for instancediv #contents > ol.salesitems > li. Click any of the elements in the Breadcrumbs to select that element.
If an element is selected in the Breadcrumbs and the Backspace key is pressed, that element is deleted. - Using the Outline pane. You can find this pane next to the Resources pane. It displays a tree view of the elements in the file. Click an element in the tree view to select it.
Styling and formatting an element
Format elements directly
Images and other graphical elements can be resized by clicking on them and dragging the resize handles. There are toolbar buttons to color, indent or style text. Other toolbar buttons can left-align, right-align, or rotate graphical elements.
The toolbar buttons only represent a selection of the formatting options for each element. There are no toolbar buttons to change an element's margins, or to add a border to it, for example. To access all formatting properties of an element, you have to open the Formatting dialog. There are two ways to do this:
- Right-click the element and select the type of element on the shortcut menu.
- Select the element (see Selecting an element) and select the type of element on the Format menu.
See Styling and formatting for more information about the formatting options.
Format elements via Cascading Style Sheets (CSS)
It is highly recommended to use style sheets in templates right from the start. Even more so if the communications are going to be output to different output channels, or if they consist of different sections (for example, a covering letter followed by a policy). Using CSS with templates allows a consistent look and feel to be applied. A style sheet can change the look of multiple elements, making it unnecessary to format each and every element in the template, time and again, when the company's layout preferences change. See Styling templates with CSS files.