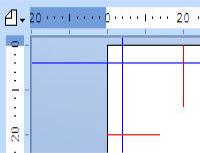
Folding Lines
You can use folding lines to determine where to fold documents. Folding lines are printed on the visible part of the document (the part that will remain when the document is cut to the right size, for example they are also printed when there is no bleed margin). Unlike guide lines, folding lines are part of the print output, they are printed on either side of the document.
To add a folding line
|
|
Windows 1-Insert from the Insert menu Mac From the View menu, select Layout Ruler. Select either a horizontal or vertical guide line. |

To change a folding line:
-
Length - Use the Imposition settings dialog box to change the length of the folding line. The overlay length of a folding line specifies the length on the visible part of your document (for example, excluding any bleed margin).
-
Color - Use the Program settings dialog box to change the color of the folding line.
To modify a folding line position
- Select the Folding line.
- Right click on it.
- From the menu select "Position"
The window will show the current coordinates of the folding line. - Enter the new coordinates for the line position.
To remove a folding line
It is possible to remove a folding line by dragging it to an invalid location outside the layout. The drag cursor is updated to reflect whether releasing the mouse button will move or remove the folding line. Alternatively right click on the folding line and from the menu select " Remove" .