Open topic with navigation
Dismiss this until next updateThis documentation has been updated
The latest version of
PrintShop Mail is currently
7.1. This documentation was updated on
2011-03-29 and covers the changes made in this version. If you are still using an older version of
PrintShop Mail, you can access its documentation by using the
Version: menu at the top-right corner of this screen.
If you wish to upgrade to
PrintShop Mail7.1, you can do so via the
Upgrade Request page. Note that in order to upgrade, you will need a valid OL Care contract as of
2010-09.
Add Static and Variable Images
In PrintShop Mail, image objects can contain either static or variable images. Using variable images with PrintShop Mail allows you to personalize your documents with pictures.
About static images
Static images are not linked to a variable, which means that they are always associated with the same image file throughout your whole document.
To insert a static image

|
- Click on the Image Object button in the Tools toolbar.
- Using your mouse, create a box on the document by clicking and holding the mouse button where you want one corner to be, then moving the mouse to where you want the opposite corner and letting go of the button.
- In the dialog box, browse to the image to insert.
- Click Open.
|
You can also insert the Image Object via the Insert -> Image File menu. This create the Image Object at the top-left corner of the document.
Images added to the document will be within an area called the Bounding Box. You do not manipulate the image directly but rather its bounding box. Images will always fit within the bounding box and their image ratio will not change. For example, if you resize the bounding box horizontally to make it wider, the image will center itself but not be bigger. If you resize the box vertically afterwards, then the image will grow to fit. The initial size of an image depends on its resolution. PrintShop Mail assumes an image resolution of 96 DPI (Dots Per Inch), except for EPS (72 DPI) and TIFF files. The resolution of a TIFF image is stored in the file itself.
About variable images
Variable images are linked to variables in the same way as variable text. The result of the expression associated with a variable image should be an image file name.
To insert a variable image

|
- Click on the Insert Image Box button in the Tools toolbar.
- Using your mouse, create a box on the document by clicking and holding the mouse button where you want one corner to be, then moving the mouse to where you want the opposite corner and letting go of the button.
|
To set the variable image folder and file name
- Double-click on the variable image box.
- Browse to the folder where you want to look for images.
- Double-click on one of the images.
- Open the Variables tab and double-click on the variable that corresponds to the name of the image object you just created (such as Image1, Image2, Image3).
- Use the Expression Editor to determine what image will appear. The result of the expression must be the actual file name of the image in the same folder, including the extension (.jpg, .png, etc). See Building Expressions.
Technically, both image objects are the same - we offer both for the convenience of adding the one that will offer the correct dialog box. Both image types are cached using your print technology, where each individual image is cached once and referred to multiple times.
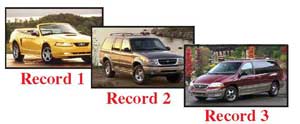
Examples of Variable Image documents
Example: Image filename is "As is".
If your database contains a field that already has the name of the image you want do display including the extension, you can refer to it directly in the image's expression. For example, if your database has a field called "Car Pic", you could simply use the expression [Car Pic] in your expression.
| ZIP
|
CAR
|
CAR PIC
|
| 91335 |
Mustang |
Mustang.jpg |
| 75038 |
Explorer |
Explorer.jpg |
| 60173 |
Windstar |
Windstar.jpg |
| 33351 |
Explorer |
Explorer.jpg |
Result:

Example: Condition triggered by the contents of a data field.
If your database contains a small trigger that can be used to dynamically determine what image will be displayed, you can use a condition in the expression to determine what image will be shown depending on that trigger. For example, if you have a field called "Car Type" that contains either A, B or C which refer to a specific car type, you can use that.
|
ZIP
|
CAR
|
CAR TYPE
|
|
91335
|
Mustang
|
A
|
|
75038
|
Explorer
|
B
|
|
60173
|
Windstar
|
C
|
|
33351
|
Explorer
|
B
|
Expression
IF([CAR TYPE] = "A", "Mustang.jpg",
 IF([CAR TYPE] = "B", "Explorer.jpg",
  IF([CAR TYPE] = "C", "Windstar.jpg","")))


