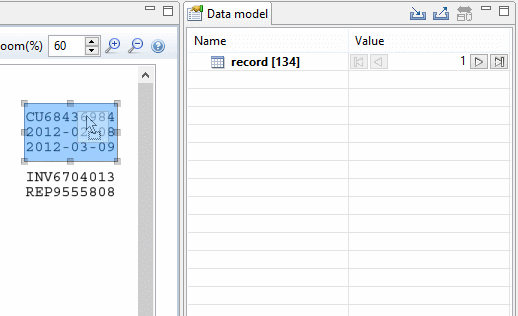
Data Model Pane
The Data Model pane displays the result of all the preparation and extraction done by the process. The pane displays the content of a single record within the Record Set.
The order in which these panes were presented corresponds to the order in which they are normally used to create a data mapping configuration.
Data is displayed as a tree view, with the root level being the Record table, levels below it being detail tables, and any level below being called Nested Tables.
The Data Model is also used as a navigation tool between records and all tables.
Adding Data
Beyond the methods for adding data described in the Steps Pane and the Data Viewer, there is a specific way to add an Extract step directly into the Data Model pane, which is drag & drop: Dragging a data selection (text and PDF) or a field (CSV, XML and Database) into the Data Model pane will automatically add the appropriate extraction method into a specific location.
There are some specific tricks and limitations, however:
- If no Extract step is currently selected in the Steps Pane, a new Extract step is created. If an Extract step is selected, new Extract Fields are added to this existing step.
- Dragging a data selection or fields into a specific level of the Data Model (Record or detail tables) will add the fields to that level.
- When dragging data into a detail table, the Extract Step must be located within the appropriate Repeat Step, otherwise the extract will not function properly.
- If a Data Model is loaded into the Data Model Pane, when dragging named fields (CSV, XML, Database), if a field of the same name exists in that level, the extract field extract the data to that field, otherwise it creates a new one.
- Dragging a single field onto a Data Model field will extract to that field regardless of name.
Modifying the Data Model
It is possible to modify the fields within the Data Model pane, effectively generating data models, even if no data is present in the pane. To do this, use the contextual menu within the pane itself. The following options appear depending on the selected line when right-clicking:
- Add a field: Click to add a new field at the current level (record or table). Enter the field name in the dialog and click OK to add it.
- Add a table: Click to add a new table at the current level (record or existing table). Enter the table name in the dialog and click OK to add it.
- Rename: Click to rename the selected table or field. Enter the new name and click OK to rename. Only available for empty Data Model Fields (see below) tables that only contain them.
- Delete: Click to delete the selected table or field. Only available for empty Data Model Fields or tables that only contain them.
- Set Type: Use the list to select which the field type (see Data Types). Only available for empty Data Model Fields or tables that only contain them.
- Default Value: Click to set the default value for empty Data Model Fields. This value is used if no extraction is present, or if an extraction attached to this field returns no value.
Field Display
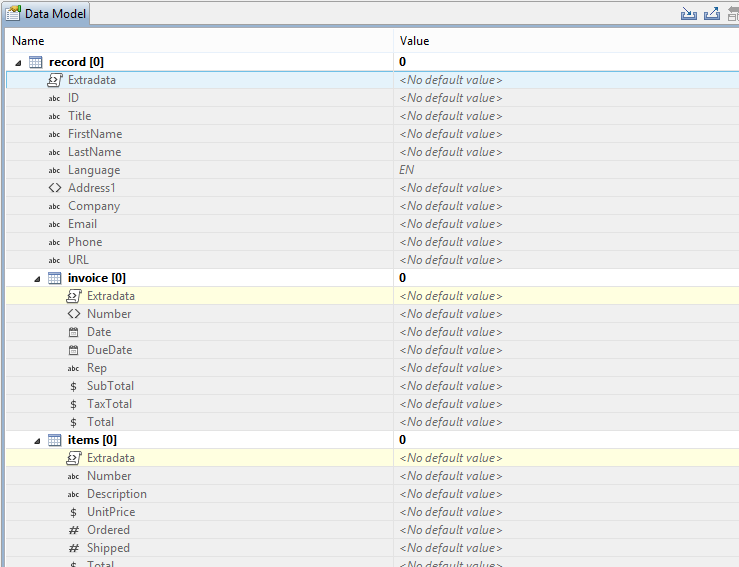
Fields in the Data Model pane are displayed in specific ways to simplify comprehension of the display data:
- Value: The current value of the extracted field, based on the current Source Record.
- The column on the left displays the name of the field. The column on the right displays the extracted data if it exists.
- The column on the right displays the current valueof the extracted field based on the current Source Record, when anExtract Step has an extraction for this field.
- The icon to the left of the name indicates the Data Type of the field (see Data Types).
- A field name with an asterisk to the right indicates that this field is part of an imported Data Model file (called a Data Model Field).
- A field with a grey background indicates this Data Model Field does not have any attached extracted data.
- A field with a white background indicates that the field has attached extracted data but the step extracting the data is not currently selected.
- A field with a blue background indicates that the field has attached extracted data and the step extracting the data is currently selected.
Record Navigation
Records can be navigated directly from the Data Model Pane. The default Record level navigates between records both in the Data Model pane and the Data Viewer, while each table has a similar navigation that influence that table and each under it.
- Expand/Contract: Click to hide or show any fields or tables under the current table level.
- Table Name: Displays the name of the table as well as the number of records at that level (in [brackets]). At the Record level this is the number of Source records (affected by the Boundary settings, Preprocessor and the Record Limit setting). In other levels it represents the number of entries in a table.
- Number of Records: The number of available records in the Data Sample. Affected by the Boundary settings, Preprocessor and the Record Limit setting.
- First Record: Jumps to the first record in the Data Sample. Disabled if the first record is already shown.
- Previous Record: Moves to the previous record in the Data Sample. Disabled if the first record is already shown.
- Current Record: Displays the current record or table entry. Type in a record number and press the Enter key to display that record. The number has to be within the number of available records in the Data Sample.
- Next Record: Moves to the next record in the Data Sample. Disabled if the last record is already shown.
- Last Record: Jumps to the last record in the Data Sample. Disabled if the last record is already shown. If a Record Limit is set in the Settings Pane, the last record will be within that limit.
Importing/Exporting Data Models
Within the Data Model pane, data model files can be exported using the current structure, or imported in order to simplify the extraction process.
Importing and Exporting Data Models is done from within the Data model
Pane, using the top-right icons ![]() and
and ![]() .
.
Rules for importing:
- Imported Data Model fields always overwrite existing field properties when the field name is the same. Non-existent fields are created automatically with the appropriate field settings. The import is case-insensitive, so fields with a different case will be ignored.
- All data model fields are tagged with the Asterisk (*). If overwriting an existing data model, existing data model fields that are not in the imported data model file will have their asterisks removed.
Dynamically Added Fields
There are a number of instances where data needs to be added to the data model after the initial data mapping operation has been performed. For instance, you might need to add a cleansed postal address next to the original address. Or use a Workflow process to retrieve a value from a Database and add it to the data record. However, the data model is not extensible. Once a data record has been created, the contents of its fields can be updated but not its structure.
A new Extradata field is automatically created at every level of each data record. That means the record itself gets an Extradata field, and each detail table also gets one.
This is what it looks like from the Designer interface:
The field is not visible in the DataMapper because no data can be extracted into it during the data mapping process. But it will be visible in the Designer, even for existing data models.
The only way to add a value to the Extradata field is by using a PlanetPress Connect Workflow process. For example, It could basically include the following steps (2 and 3 are optional):
- Start the data mapping process.
- Save the Metadata.
- Create a database with the Metadata.
- Add a value to the Extradata field of this database.
Steps 2, 3 and 4 can also be replaced by the Update Data Record plugin or by using a REST call.
Please refer to PlanetPress Connect Workflow documentation for more information.