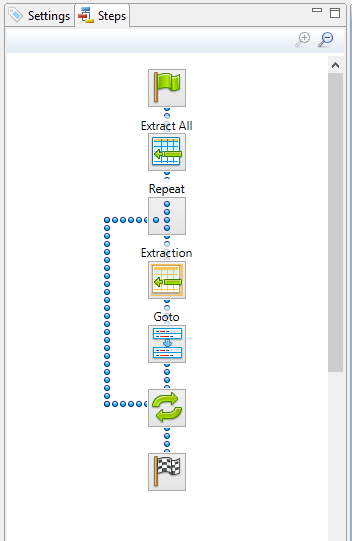
Data Mapping Workflow
A data mapping workflow is a series of steps used to process and extract the data from Source Records and store them into Records (see Data Model). Together with the data model, it is what makes a data mapping configuration (See Data Mapping Configuration).
A data mapping workflow always starts with the Preprocessor step and ends with the Postprocessor step. It can contains as many steps as needed for extracting the required data.
When working with a data mapping workflow, you need to consider the following:
- Promotional versus transactional data: Depending on the type of data, whether it is promotional or transactional, you will use different extraction workflows. See About Promotional and Transactional Data for more information.
- Steps: To extract data from the data sample, different steps are used that make up the extraction process. See Steps for more information.
Selecting Data
In order to extract the data, it is necessary to first define the data to be extracted by selecting it. The following topics contain information about how to create and manipulate a data selection, and also how to create steps from it.
From a Text File
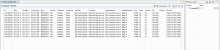
The Text data viewer displays the text-based contents of the Data Sample that is currently active within the data mapping configuration in a grid-like fashion, with each character in the file being in a separate grid position.
To select data, click on a starting character within the grid, keeping the mouse button down, dragging to the end character and releasing the button. This creates a data selection that can contain multiple lines.
From a PDF File
The PDF data viewer displays the PDF file contents of the Data Sample that is currently active within the data mapping configuration as pages.
To select data, click on a starting point, keeping the mouse button down, dragging to the end location and releasing the button. This creates a data selection that can contain multiple lines.
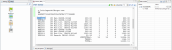
From a CSV or a Database File
The CSV/Database data viewer displays the field-based contents of the Data Sample that is currently active within the data mapping configuration in a grid-like fashion, with each field being in a separate grid position.
To select data, click on a starting point, keeping the mouse button down, dragging to the end location and releasing the button. This creates a data selection that can contain multiple lines.
From a XML File
The XML data viewer displays the XML-based contents of the Data Sample that is currently active within the data mapping configuration in a tree view, with XML fields displayed at each level of the Sample Record.
To select data, click on a starting point, keeping the mouse button down, dragging to the end location and releasing the button. This creates a data selection that can contain multiple lines.
Manipulating a Data Selection
From a Text File
The Text data viewer displays the text-based contents of the Data Sample that is currently active within the data mapping configuration in a grid-like fashion, with each character in the file being in a separate grid position.
Once created, data selections can be modified and moved in order to change or extend the data included in the selection. You can also modify a data selection that is attached to a field extraction in an Extract step by double-clicking on the data selection in the Data Viewer and then modifying the data selection.
Moving a Data Selection
To move a data selection, click and hold anywhere on the data selection, move it to its new desired location and release the mouses.
Resizing a Data Selection
To resize a data selection, click and hold on one of the resize handles on the borders or corners, move them to the new size and release the mouse.
From a PDF File
The PDF data viewer displays the PDF file contents of the Data Sample that is currently active within the data mapping configuration as pages.
Once created, data selections can be modified and moved in order to change or extend the data included in the extraction. Moving a new data selection can be done directly if the data selection is new. Data selections that are attached to a field extraction in an Extract step can also be modified by double-clicking on the data selection in the Data Viewer and then modifying the data selection.
Moving a Data Selection
To move a data selection, click and hold anywhere on the data selection, move it to its new desired location and release the mouse.

Resizing a Data Selection
To resize a data selection, click and hold on one of the resize handles on the borders or corners, move them to the new size and release the mouse.
From a CSV or a Database File
The CSV/Database data viewer displays the field-based contents of the Data Sample that is currently active within the data mapping configuration in a grid-like fashion, with each field being in a separate grid position.
Once created, data selections can be modified. Modifying a new data selection can be done directly if the data selection is new.
Modifying a Data Selection
To modify a data selection, press and hold the CTRL key click, and click on a field to add it or remove it from the selection (the blue color indicates that the field is part of the current selection).
From a XML File
The XML data viewer displays the XML-based contents of the Data Sample that is currently active within the data mapping configuration in a tree view, with XML fields displayed at each level of the Sample Record.
Once created, data selections can be modified. Modifying a new data selection can be done directly if the data selection is new.
Modifying a Data Selection
To modify a data selection, press and hold the CTRL key click, and click on a field to add it or remove it from the selection (the blue color indicates that the field is part of the current selection).
Extracting Data
The following example explains in detail how to perform a data extraction for each different data source file types and the Steps used to achieve it. Delimiters and Boundaries must be properly configured beforehand (see Configuring Settings for more information).
The Preprocessor and the Postprocessor
Data processors allow the application to perform actions on the data file itself before it is handed over to the Data Mapping workflow (preprocessors) and after the Data Mapping workflow has completed (Postprocessors).
For more information about the Preprocessor step, see Preprocessor Step Properties.
For more information about the Postprocessor step, see Postprocessor Step Properties.
The Extraction Step
The Extract step is the heart of the DataMapper software. It takes information from the Data Sample and places it in the Extracted Record within the Record Set.
To configure the settings for the extraction step such as the list of fields included in the extraction, how to change a field name, the data format of each field or if the information is extracted from a position on the page or to using a script, see Extract Step Properties.
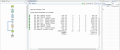
From a CSV file or a Database
Extracting Promotional Data
For more information about Promotional and Transactional data, please refer to About Promotional and Transactional Data.
- From the Viewer pane, select the fields that contain the customer and invoice information. For more information about how to select data in a CSV file, please refer to Data Selection/From a CSV File.
- Drag & drop the selected fields into
the Data Model pane.
 Alternatively, you can simply right click on the selected fields and select Add Extraction. Please refer to Menus, Toolbar and Shortcut Keys for more information about the available toolbar buttons, menus and keyboard shortcuts.
Extracting Transactional Data
The Transactional Data (line items information) appears on multiple lines. You must create a loop on these lines to extract the items information. The line items are extracted in a detail table.
- Select the fields that contain the first line item information.
- Right click on this data selection and select Add Repeat . For more information about what a Repeat step is and why it should be used, please refer to Step_types.htm.
- Right click again on this data selection and select Add Extraction. A new extraction step will be placed between the Repeat and the Goto steps.

Please refer to Menus, Toolbar and Shortcut Keys for more information about the available toolbar buttons, menus and keyboard shortcuts.
From a XML file
Extracting Promotional Data
The Promotional Data (the customer and invoice information) is normally located at the top of the Source Record, before the ITEM information. It generally includes the name, the address, reference numbers, invoice information, etc.
- Select the child leaf elements of the CUSTOMER() node.

- Right click on the selected elements and select Add Extraction.
Alternatively, you can simply drag & drop the selected elements into the Data Model pane.
- In this case, the invoice information is also part of the promotional data. Select the child leaf elements of the INVOICE() node.
- Right click on the selected nodes and select Add Extraction.

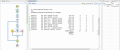
Extracting Transactional Data
The Transactional Data (line items information) appears in repeated elements. In the example below, this information appears under the parent node ITEM(). Each ITEM() node gives information about one item. Create a loop on the ITEM() nodes to extract the items information.
- Select the ITEM() node.
- Right click on the selected node and select Add Repeat.
- Select the children leaf nodes of the ITEM() node.
- Right click on the selected nodes and select Add Extraction.

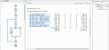
By default, when you click on the Repeat step in the Steps pane, the For Each option is selected in the Repeat type option as shown in theStep Properties pane. The loop will include each ITEM() node. In the Collection field, you will find the corresponding ITEM() node path. Please refer to Repeat Step Properties.
Please refer to Menus, Toolbar and Shortcut Keys for more information about the available toolbar buttons, menus and keyboard shortcuts.
From a Text or a PDF file
Extracting Promotional Data
The Promotional Data (customer and the invoice information) is repeated for each item and normally located at the top of the Source Record. It generally includes the name, the address, reference numbers, invoice information, etc.
- From the Viewer pane, select the customer and invoice information. Note that you can select multiple lines. For more information on how to select text, please refer to Selecting Data.
- Right click on the selection data and select Add Extraction .
Alternatively, you can simply drag & drop the selected fields into
the Data Model pane.
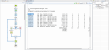
Extracting Transactional Data
The Transactional Data (line items in an invoice) appears on multiple lines and pages. A loop has to be created on these lines to extract the item's information. The line items are extracted in a detail table as described below:
- Select a simple data in the first line item. For example the product number.
- Right-click on the selection and select Add Goto. That moves the cursor to the beginning of the first line item.

- Add a loop to extract each item until the end of the line items. To stop the loop at the right place, you can use a text located at the end each record. For example, it can be a text string like SUBTOTALS, TOTAL or AMOUNT. Now you can use that text as a condition to stop the loop at the end of the line items list. In that case:
- Select the text (SUBTOTALS for example) in the Viewer.
- Right click on the selection and select Add Repeat.
The Repeat step loops on all lines until the selected text is found. Since a record can extend on more than one page, lines that are not item lines must be excluded form the extraction. You can use any exclusive information like a "." or "," in prices or totals for example.
- Select the "." or the "," in the total or in the price of the first line item.
- Right click on the selected dot and select Add Conditional. In the Viewer pane, you will see a green check mark besides each included line or X for other lines.
- From the Viewer pane, select the first field on the left for the first line item.
- Right click on the selection and select Add Extraction.
- Select the second field.
- Right click on the selection and select Add Extract Field.
- Do the same for the rest of the fields along that same line item.
The Add Extract Field step allows to add a field to an existing extract step while the Add Extract Step creates a new step in the Steps pane. For optimization purposes, it is better to use Add Extract Field than to have a succession of extraction steps.
Please refer to Menus, Toolbar and Shortcut Keys for more information about the available toolbar buttons, menus and keyboard shortcuts.
Totals Information
After the loop step, the cursor position is at the end of line items. If the record contains sums or totals at the end of the line items list:
- Select the amounts.
- Click the Repeat step in the Steps panel.
- Right click on the selection and select Add a Step/Add Extraction.

Also Note That...
- Dragging a data selection or fields into a specific level of the Data Model (record or detail tables) will add the fields to that level.
- When dragging data into a detail table (in the Data Model pane), the Extract step must be located within the appropriate Repeat step, otherwise the extract will not function properly.
- Data can be extracted conditionally. Please refer to Condition step
- If a Data Model is loaded into the Data Model pane and if a field of the same name already exists in that level, dragging a named field into it (CSV, XML, Database) will extract the data to that field. Otherwise a new one with will be created.
- Action steps could be added to the process described above in order to set the value for a Source Record property or execute a JavaScript code.
To add an Extract step, you can also use JavaScript (select JavaScript from the Mode drop-down in the Step Properties pane). Please refer to DataMapper API for more information.